Setting up the eSIM product for Zembeddable.
Setting up eSIM for Zembeddable requires just a few steps for a quick start to set margins, featured destinations and options on how you want your embedded IFRAME to behave. For in depth information about the eSIM product, refer to the eSIM Guide in Zendit University.
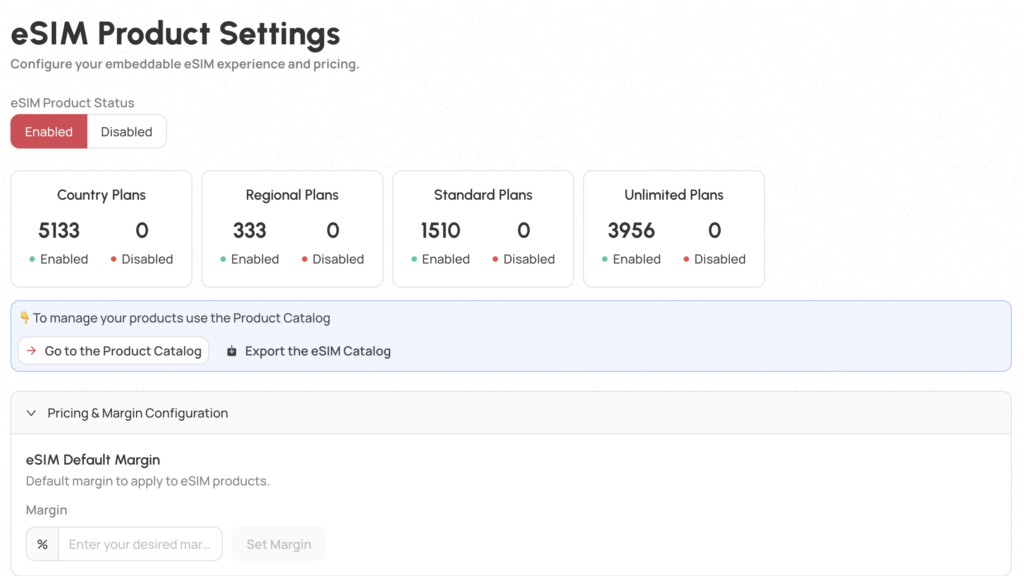
From the eSIM Catalog section, you have stats on the enabled state of items for Country Plans, Regional Plans, Standard Plans and Unlimited Plans.
You may download the product list in a CSV for reviewing outside of the console and you can set a default margin that will be applied to every eSIM product.
If you want to get more granular with pricing, you can go to the eSIM Catalog and handle enabling/disabling offers as well as setting their margins or a fixed amount of markup in the pricing module. The catalog allows bulk operations to be handled as well. See the Catalog User Guide for more information on managing your catalog.
You may set a selection of up to 4 destinations to feature on the home page of the Zembeddable.

To set the destinations, simply select up to 4 destinations to add to the list. The order may be changed by dragging and dropping items from your list to another position until you have it just right. These featured destinations will appear on the home screen.
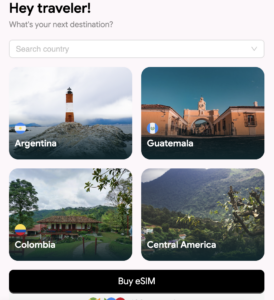
Your featured destinations will appear in the 4 spots on the home page.
eSIMs provide 2 embeddable components. One for selling and one for users to see their usage of an eSIM they purchased.
Components are available as either an IFRAME to drop into your website/app or an HTML embed that can be dropped in. IFRAME allows the embed to be dropped in and operate as a self contained component using the styles setup for your embeddable.
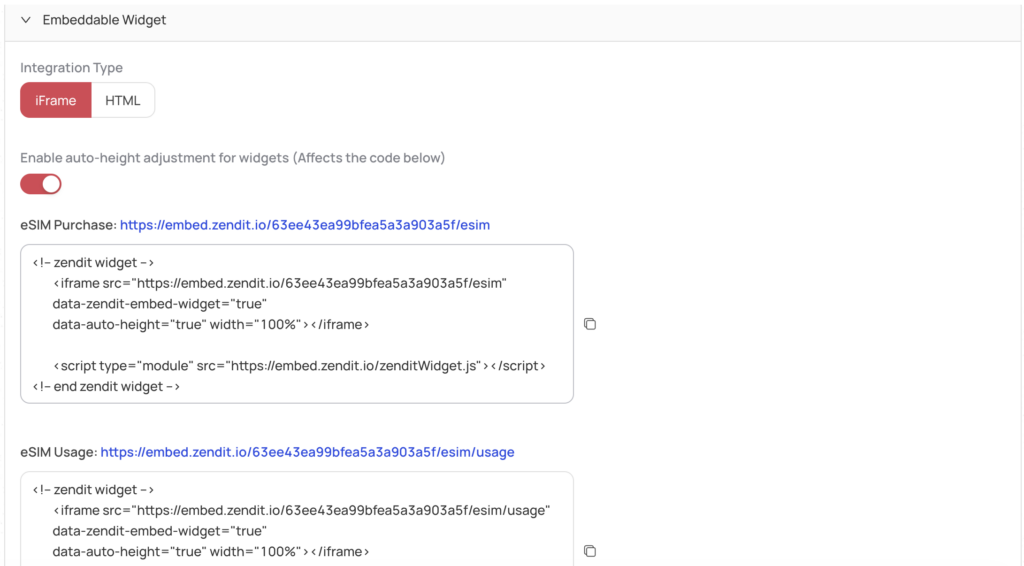
For the IFRAME, simply copy the blocks of code to drop into a purchase flow page and a usage flow page that will be used on the website or app.
In the embeddable URLs you may select whether the IFRAME autoadjusts its height or not if you want a fixed height.
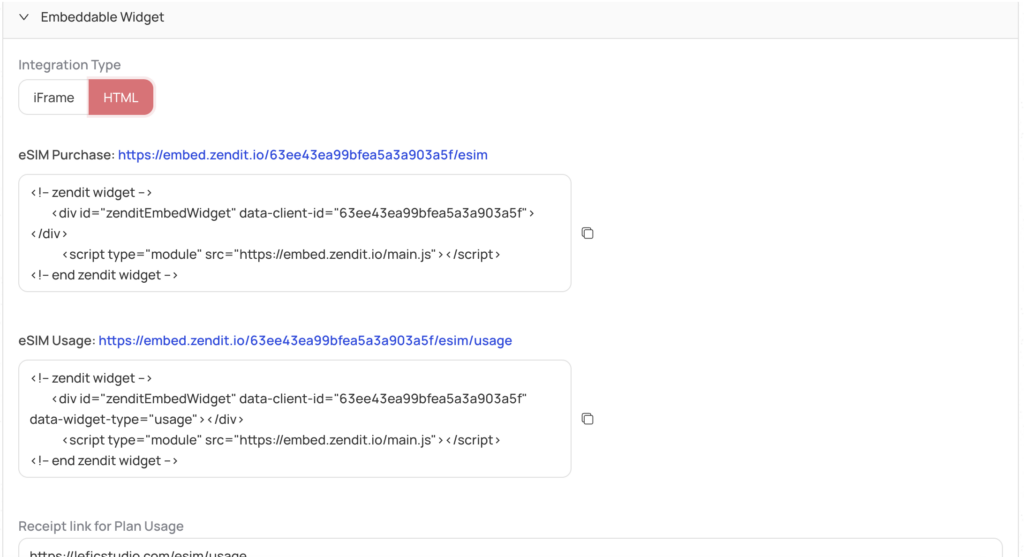
HTML embed starts with the same styles that are setup but also provides developers more control over the styling by adding their own styles to the hosting page and the ability to use any webfonts that are not available through the console.
For the HTML embed, simply copy the blocks of code to drop into a purchase flow page and a usage flow page that will be used on the website or app.
For the usage section, zendit requires the webpage or applink that will be used to present to users. It accepts an https:// format link that an app may register to trigger opening the app and navigating. The order number will be appended to this link so the usage Zembeddable is able to lookup the order and present the user with their usage, remaining data amount and remaining time for their eSIM.

For directing users from their receipt to check their eSIM usage and status, ensure the link for the receipt is setup. Omitting the link will omit the link from the receipt for checking their eSIM usage and status.
Once done setting, select the “Publish to Production” button and your setup is complete.
