Setting up Stipe details so Zembeddable can collect payments on your behalf.
The zendit components load the checkout components hosted by Stripe. zendit never collects payment details directly to remain PCI compliant. zendit uses your Stripe Publishable Key and Secret Key to initiate a checkout and after the user has paid through Stripe, zendit receives a webhook notifying that the payment was successful.
Once the payment has succeeded, zendit will handle fulfilling the order and presenting the customer with their product information as well as emailing a receipt to the customer with instructions on how to use their product.
If the payment succeeds but an error on zendit occurs and the product is not successful in fulfillment, the customer will be refunded for the purchase and presented with an error in fulfillment.
The most common reason for failing to fulfill is if your wallet balance runs out of money. To keep informed about your wallet balance, you may set alerts on your wallet balance so you know when to top it up to continue selling.
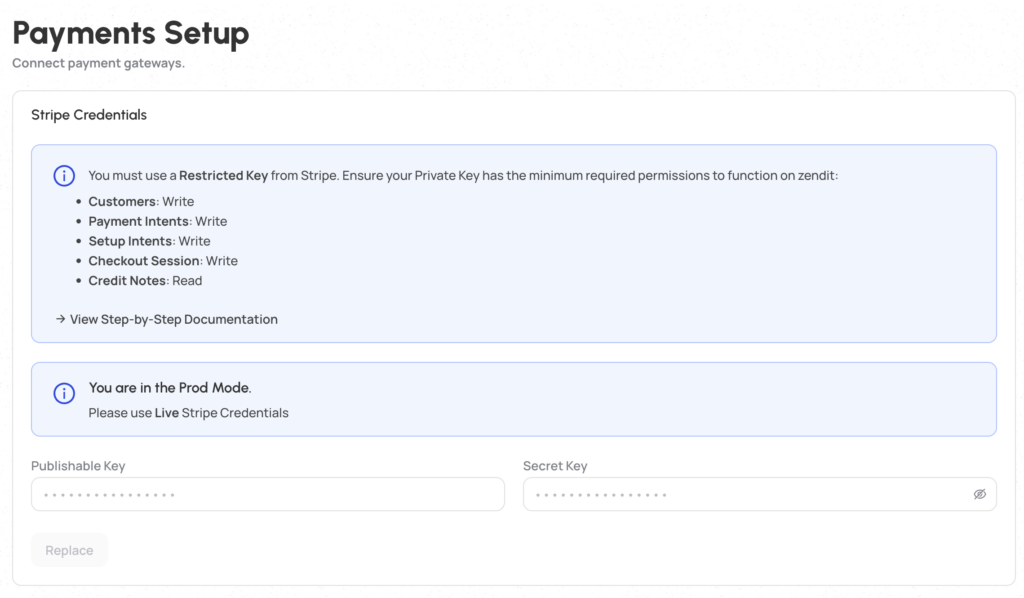
To setup payments for Stripe, we’ll need your publishable key and a secret key.
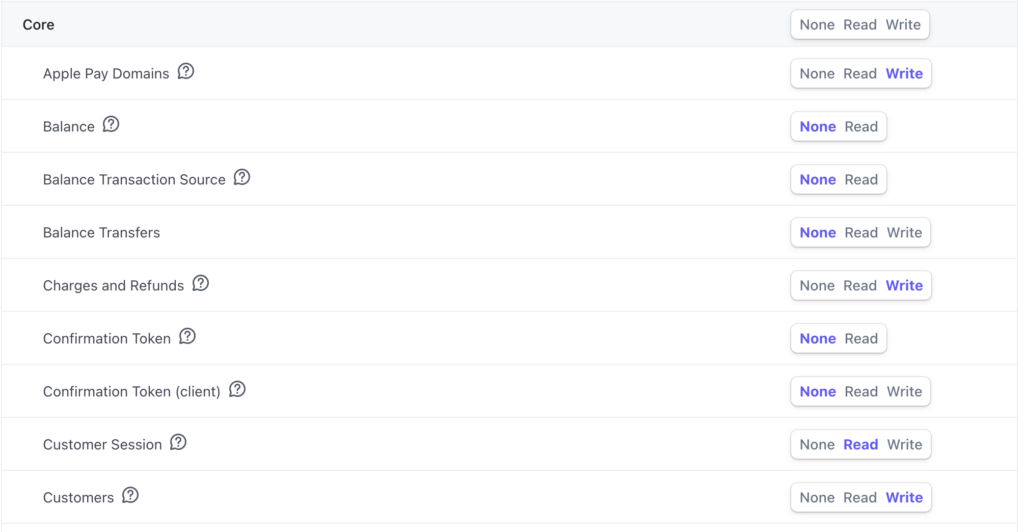
We recommend setting up a separate Stripe key for Zendit with some access restrictions. Following the instructions on Stripe to setup a restricted key. The permissions required for this key that Zendit requires write access to include:
To setup zendit, simply add your Stripe Publishable Key and the restricted Secret Key created into the Payment Setup section and set it.
Once the details are set, you are ready to setup products to sell.
Stripe provides Radar to block purchases based on rules you may set to prevent fraudulent purchases against your account. zendit recommends using Radar on your Stripe account to assist with handling attempted fraud. You may find more information on Stripe’s website.
