Zendit offers a dedicated test mode environment that is specifically designed for development and testing purposes.
Zendit offers a dedicated test mode environment that is specifically designed for development and testing purposes. This environment allows you to seamlessly integrate with the Zendit API and utilize SDKs to pull catalogs and process transactions in a controlled testing environment. It provides a safe and sandboxed environment to ensure that your integrations are working correctly and your application is functioning as expected before moving to the production environment. By utilizing the test mode environment, you can thoroughly test your integrations, validate functionality, and troubleshoot any issues or errors, ensuring a smooth transition to the production environment.
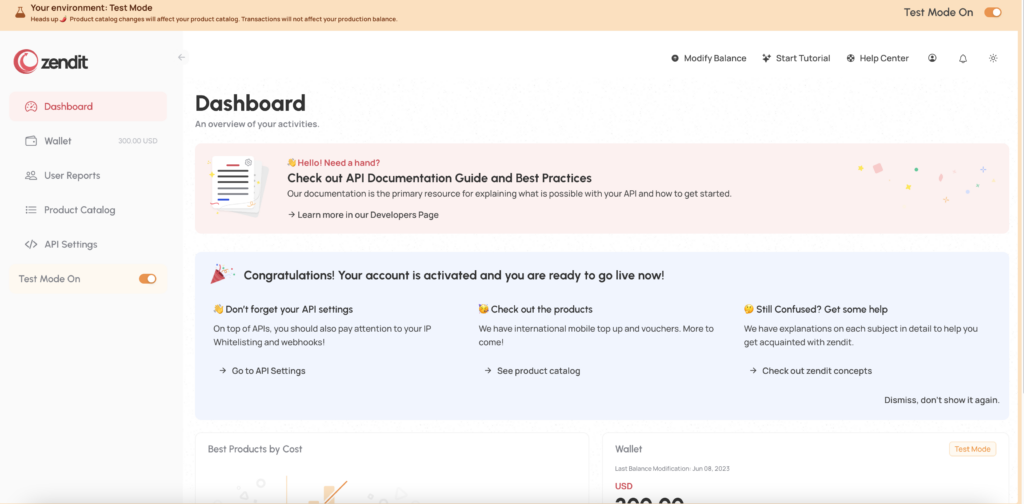
When you create an account on zendit, it is automatically set to test mode. In this mode, you have access to the wallet management functionality and can retrieve API Keys to use with the zendit API or SDKs. Once you are ready to move to the production environment, you can upgrade your account. After the upgrade, you can toggle between the test mode and production mode in the console. This allows you to switch back to the test mode environment to manage your wallet balance if needed. It provides the flexibility to test and manage your wallet separately from the production environment, ensuring a smooth transition and efficient management of your account.
When you are in test mode on zendit, you will notice a border around the user console. This visual indicator helps you easily identify that you are operating in the test environment. If your account has been activated for production mode, you can use the toggle switch to switch between test mode and production mode. This allows you to seamlessly transition between the two environments, depending on your needs. The toggle switch provides a convenient way to switch the environment within the user console, ensuring a smooth workflow as you navigate between test and production environments.
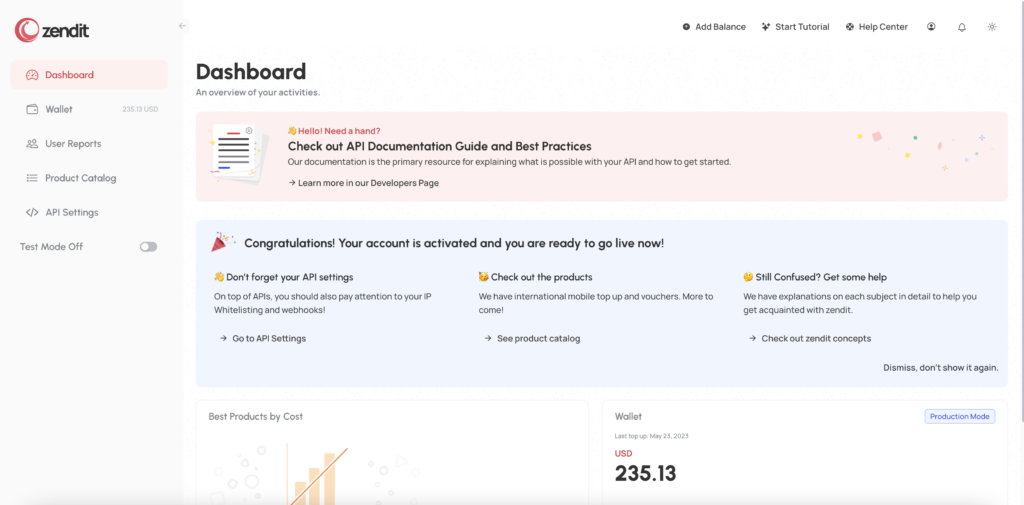
In production mode on zendit, the border that indicates test mode is removed from the user console. This visual change serves as a clear indication that you are now operating in the production environment. By removing the border, zendit ensures that you can easily differentiate between test mode and production mode, helping you stay aware of the environment you are currently working in. This visual cue provides a helpful reminder to exercise caution and adhere to best practices when performing actions in the production mode of your zendit account
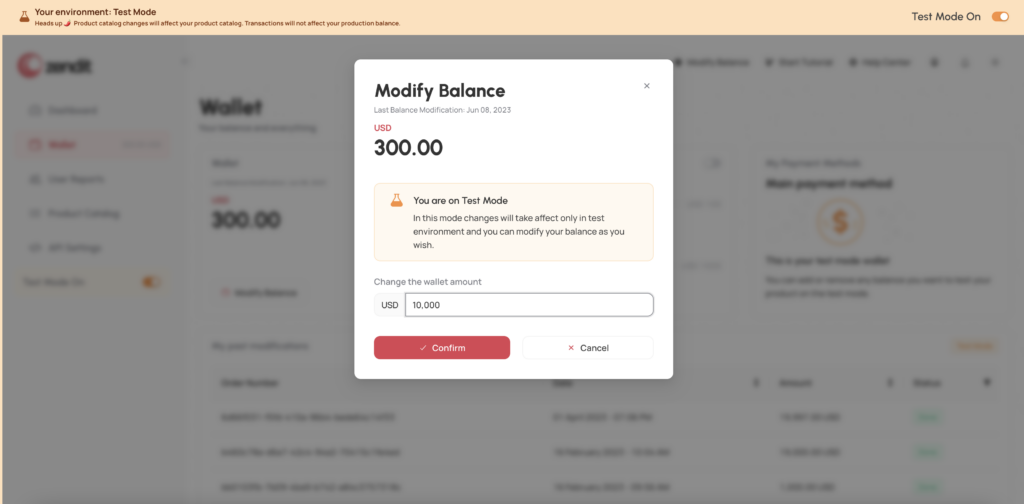
In zendit’s test mode, you have the flexibility to manage your test mode wallet by setting the balance to any desired amount. This feature enables you to simulate various scenarios during testing. For instance, you can set a low or depleted balance to test scenarios where transactions fail due to insufficient funds. Alternatively, you can set higher values to test the processing of a large volume of transactions and ensure that your integration is functioning properly.
It’s important to note that transactions in test mode are processed using simulators for service providers. These simulators mimic the behavior of real top-up transactions but do not perform actual top-ups or involve real funds. The funds in the test mode wallet are simulated and do not require any payment to fund them. This allows you to thoroughly test and validate your integration without incurring any financial costs.
By providing this flexible and simulated environment, zendit empowers you to confidently test various scenarios and ensure the smooth operation of your integration before transitioning to the production environment.
To add funds to your wallet in Zendit, follow these steps:
By following these steps, you can easily add funds to your wallet and ensure that it has the desired balance for processing transactions.
To access your API Key in Zendit, follow these steps:
By following these steps, you can access and retrieve your API Key in Zendit, whether you are in Test Mode or Production Mode, and use it for your integration purposes
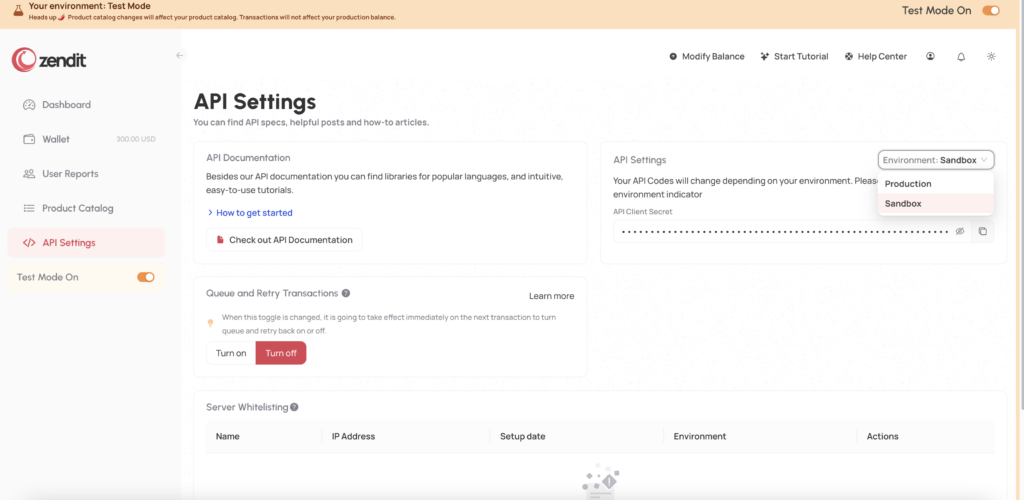
If your account has not been set up for production, you will only have the option to select the Sandbox key in the API Settings section.
o test the API using Swagger, follow these steps:
If you are using a generated client or an SDK provided by zendit, you will need to set the API key in your configuration. This allows the client to authenticate against the API using your key, enabling you to test your integration seamlessly.
