This document will guide you through setting up webhooks for your zendit integration.
Skip the preamble and just get to the example code?
Zendit employs asynchronous processing for transactions that allows integrations to either use a polling mechanism for the status of a transaction, or setup a webhook receiver so zendit can send transaction results when they complete. Webhooks are built in the integration as receivers on servers hosted by the client and the addresses are setup in the console to keep them secure.
When creating a webhook receiver, the endpoints need to support both the HEAD and POST requests. When setting up the URL to your webhook we use a HEAD request to verify that the webhook is reachable by our service. We’ll show an error message on the console when setting up the webhook to note the issue reaching the webhook server. The IP addresses from our service need to be whitelisted on any firewalls to the webhook server so we can send traffic to it. Once we are able to make a HEAD request to the service, the webhook can be saved and transactions that come into zendit will send the results of the transactions to the webhooks.
Since the format of topup and voucher transactions differ, a webhook needs to be created for both types of transactions. When setting up the webhook, you will also specify which environment for the webhook since we support webhooks for both test mode and production environments.
For additional security, you may set a header for authorization with a value on the setup of the webhook to ensure that the webhook received from zendit is genuine.
The transaction format for a webhook from a topup (see API Spec for more information) is identical to retrieving a transaction status from the API and will be sent in the following format:
The webhook format for a voucher (see API spec for more information) is identical to retrieving the transaction status from the API and will be sent in the following format:
The webhook format for a eSIM (see API spec for additional information) is identical to retrieving the transaction status from the API and will be sent in the following format:
As a transaction flows through zendit’s processing, webhooks will be sent for updating the current status of the transaction until it reaches the final status of DONE or FAIL. Webhooks will be sent when the transaction is IN PROGRESS and if you have Queue & Retry setup in your integration, each retry event on the transaction will send an update to confirm that it is retrying until it completes.
When creating your webhook server, it is important to make sure it is optimized for performance. We recommend setting it up so once received, the webhook is pushed onto a background task and the receipt is acknowledged immediately with a 200 error. If there is any degradation in performance and getting a response takes longer than 10 seconds, zendit will assume that sending the webhook failed and will retry the webhook.
In the event that a webhook service is not reachable, zendit will retry each transaction on an escalating schedule as follows:
Each retry is the delayed time after the previous failure allowing up to 22+ hours of outage time. An alert will be sent by zendit after 1 hour if any webhooks are failing to reach the webhook server. Alerts will continue to be sent hourly for failures in sending webhooks. If webhook service is down for longer than 23 hours, transactions not received after recovering from a failure will need to be polled from the API to retrieve their status. Transactions may be polled from the API at any time if recovering from an outage and it is desired not to await the next retry attempt from zendit.
To setup webhooks, head to the user console (console.zendit.io) and navigate to the API Settings page. Below the IP Whitelist settings you will find the Webhooks setup:
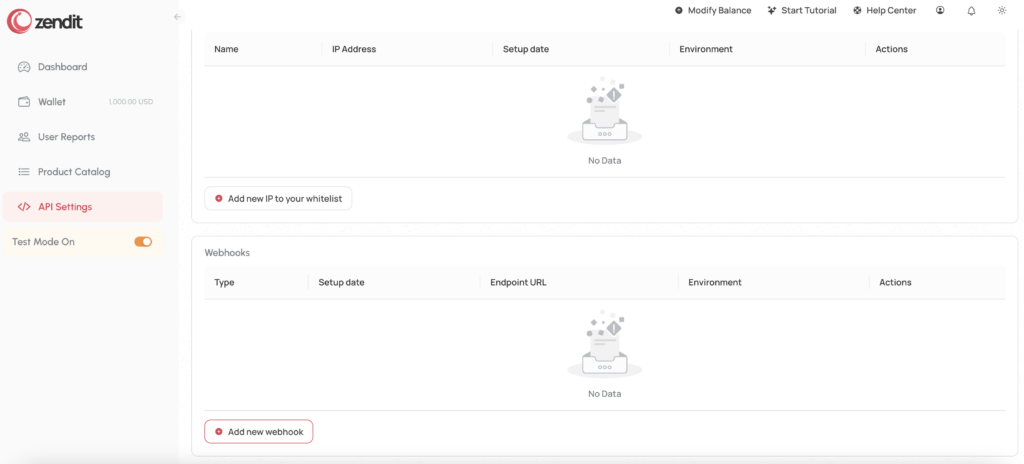
To create your webhook, click the Add new webhook button
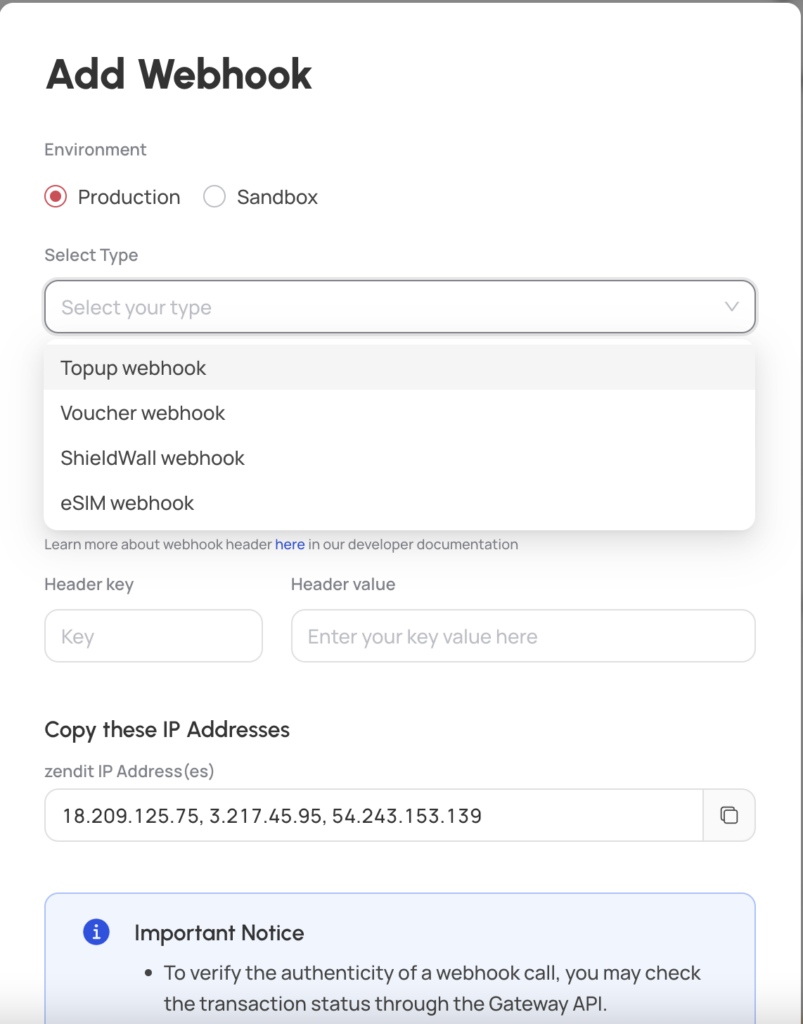
In the popup dialog, select the environment for the webhook Production for your production environment or Sandbox for your test mode environment, then select the type of webhook (Topup or Voucher), set the address of the webhook and if you have a authorization header, set the header key name and the value your webhook server is using to verify the legitimacy of the webhook. Make sure the zendit IP addresses are whitelisted on your firewall and your webhook server is reachable, then click the verify button.
It is recommended to add an Authorization header requirement to your webhook and a long, encoded authentication string (not your API Key) so when results are sent to your webhook server, they can be authenticated as genuine before processing them.
It is recommended that you set a schedule for rotating the value of this header (e.g. every 90 days) to ensure that if the header authentication is compromised, illegitimate webhooks will not be processed by your webhook server.
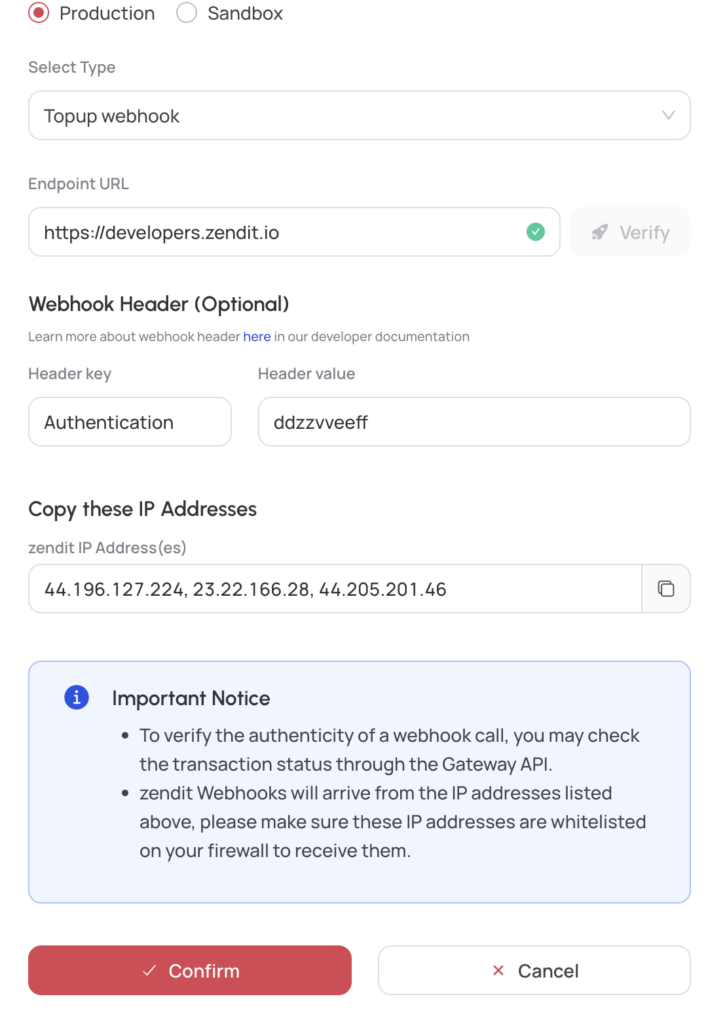
In this example, the webhook pointing to https://developers.zendit.io is an example, you should supply the address of your webhook server and endpoint for the type of webhook. Once verification has passed, you can click the confirm button to save the webhook.
When complete, you will see the webhook in the list of webhooks for your setup and the webhook will be active.
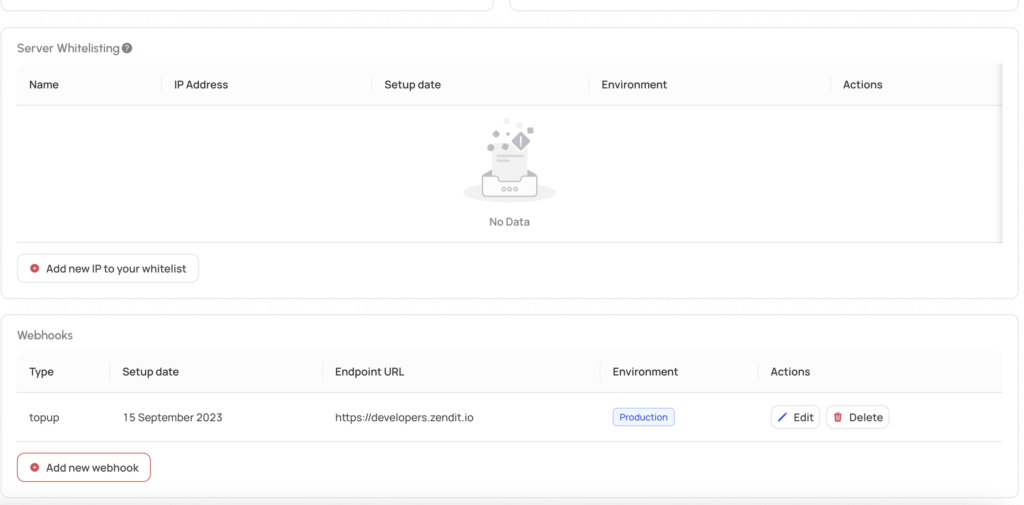
You may edit or delete your webhook at any time. For edits, you must click the verify button for any changes so zendit can verify it can reach your webhook service before you can save it.
All sample code for the webhooks is written in TypeScript for Node.js with Express and the Zendit Node.js SDK.
import express, { Request, Response } from "express";
import { DtoTopupPurchase, DtoTopupPurchaseFromJSON } from "@zenditplatform/zendit-sdk";

export const mtuWebhook = express.Router();

const bodyParser = require('body-parser');
const jsonParser = bodyParser.json();

// Used by head request to verify webhook
mtuWebhook.get("/webhook/mtu", (req: Request, res: Response): void => {
    res.send("OK");
 });

 // Called by Zendit with response to MTU transaction
 mtuWebhook.post("/webhook/mtu", jsonParser, (req: Request, res:Response): void => {
    try {
       // Check validity of webhook format
       const response:DtoTopupPurchase = DtoTopupPurchaseFromJSON(req.body);
       // Process the webhook asynchrnously to acknowledge the webhook from Zendit
       processWebhook(response);
    } catch (error) {
        // Throw a 500 error to Zendit due to malformed data
        console.log(error);
        res.sendStatus(500);
    }
    // Return a 200 success to Zendit
    res.send("OK")
 });

 // Process MTU response async so webhook can return response to Zendit upon receipt
 async function processWebhook(content: DtoTopupPurchase) {
    // Implement this function to update the transaction status in your environment
    // and inform your customer the success or failure status of their transaction
    console.log(content);
}import express, { Request, Response } from "express";
import { DtoVoucherPurchase, DtoVoucherPurchaseFromJSON } from "@zenditplatform/zendit-sdk";
export const voucherWebhook = express.Router();
const bodyParser = require('body-parser');
const jsonParser = bodyParser.json();
// Used by head request to verify webhook
voucherWebhook.get("/webhook/voucher", (req: Request, res: Response): void => {
res.send("OK");
});
// Called by Zendit with response to Voucher transaction
voucherWebhook.post("/webhook/voucher", jsonParser, (req: Request, res:Response): void => {
try {
// Check validity of webhook format
const response:DtoVoucherPurchase = DtoVoucherPurchaseFromJSON(req.body);
// Process the webhook asynchrnously to acknowledge the webhook from Zendit
processWebhook(response);
} catch (error) {
// Throw a 500 error to Zendit due to malformed data
console.log(error);
res.sendStatus(500);
}
// Return a 200 success to Zendit
res.send("OK")
});
// Process Vouher response async so webhook can return response to Zendit upon receipt
async function processWebhook(content: DtoVoucherPurchase) {
// Implement this function to update the transaction status in your environment
// and inform your customer the success or failure status of their transaction
console.log(content);
}import express, { Request, Response } from "express";
import { DtoESimPurchase, DtoESimPurchaseFromJSON } from "@zenditplatform/zendit-sdk";
export const esimWebhook = express.Router();
// Used by head request to verify webhook
esimWebhook.get("/webhook/esim", (req: Request, res: Response): void => {
res.send("OK");
});
// Called by Zendit with response to esim transaction
esimWebhook.post("/webhook/esim", (req: Request, res:Response): void => {
try {
// Check validity of webhook format
const response:DtoESimPurchase = DtoESimPurchaseFromJSON(req.body);
// Process the webhook asynchrnously to acknowledge the webhook from Zendit
processWebhook(req.body);
} catch (error) {
// Throw a 500 error to Zendit due to malformed data
console.log(error);
res.sendStatus(500);
}
// Return a 200 success to Zendit
res.send("OK")
});
// Process eSIM response async so webhook can return response to Zendit upon receipt
async function processWebhook(content: DtoESimPurchase) {
// Implement this function to update the transaction status in your environment
// and inform your customer the success or failure status of their transaction
console.log(content);
}To test your webhook on a local developer environment, ngrok is an easy tool to create a tunnel between a test service running on a local environment with a public URL. At the free tier, a single public domain address can be setup on an ngrok account and agents are available for MacOS, Windows, Linux, FreeBSD, RaspberryPi or a docker image.
Once setup with ngrok, start your local server and the ngrok agent then simply point your Zendit webhooks to the static domain that is assigned to your account (you can use the same domain with multiple webhooks on different endpoints of your service) and start testing transactions. Your local service will receive the webhooks via ngrok’s agent.
When ready for QA, deploy your service to a location addressable by Zendit’s public IPs and update the location of the webhooks for your test mode environment to your QA deployment. When testing is complete, deploy your webhooks to your production environment making sure the service is accessible from Zendit’s public IPs and put in the public endpoints for your service.
Once setup, you can forget polling and just receive webhooks when transactions have completed.
